
 USD
 CAD
 EUR
 GBP
 AUD
 NZD
 CHF
 SEK
 NOK
 JPY
 CNY
 INR
 SGD
 MXN
 BRL
 ZAR
 KRW

To add your own command to the SOLIDWORKS PDM right-click menu, create a vault script in PDMShell, turn on Show in the PDM menu on the Triggers tab, give it a menu label, and save it to the vault. In this guide we build a five line script that checks out the selected file, updates three data card properties and checks it back in.
Right-click commands are the friendliest way to hand automation to engineers. Nobody needs to open PDMShell, remember a command or wait for a workflow transition. They select a file in File Explorer, right-click, pick the command, and the PDMShell add-in does the rest. The administrator sets it up once.
What you need first
- PDMShell installed on your machine and the PDMShell add-in installed in the vault.
- A login to the vault with the SOLIDWORKS PDM Edit add-ins permission. Managing vault scripts requires it.
- A PDMShell license. When a menu script runs, the add-in uses the machine license or borrows a seat from the vault license pool, as explained in how PDMShell licensing works.
- The names of the data card variables you want to update. The examples below use Description, Checked By and Checked Date. Swap in your own.
The script we are building
checkout -filePath "$localPath"
setvar -filePath "$localPath" -variableName Description -value $value -stringformat UpperCase
setvar -filePath "$localPath" -variableName "Checked By" -value "$username.FullName"
setvar -filePath "$localPath" -variableName "Checked Date" -value "$yyyy-$MM-$dd"
checkin -filePath "$localPath" -comment "Properties updated by PDMShell"
Five lines, one job each. Check out the file that was right-clicked, write three properties, check it in with a clear comment. We will build it step by step in the visual editor, then look at each line.
Step 1: open PDMShell and log in to the vault
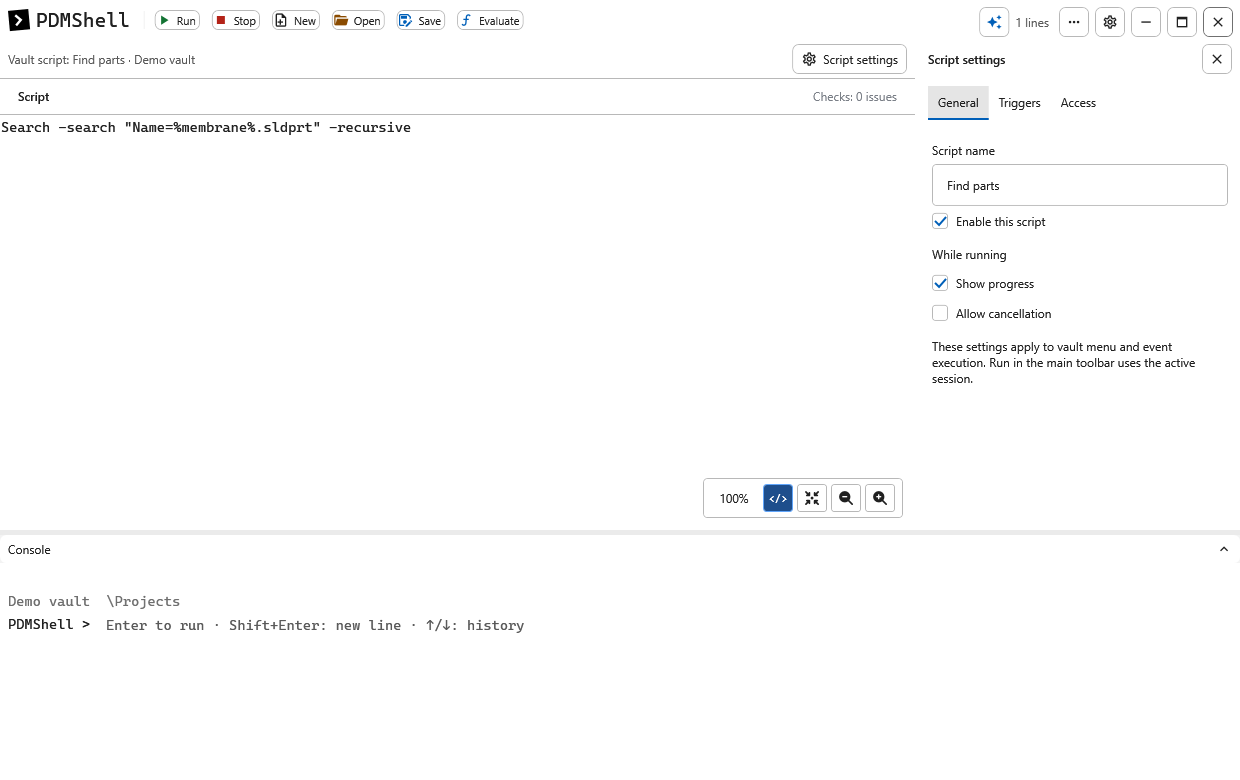
Start PDMShell and log in to the vault where the script should live. Everything you need for this guide is on the main toolbar: New, Open and Save, plus Run and Evaluate for testing.

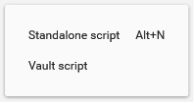
Step 2: click New, then Vault script
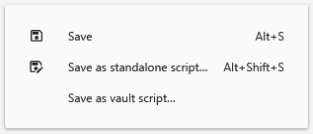
Click New on the toolbar and choose Vault script. A standalone script is saved as a .pdmshell file on disk; a vault script is stored in the vault and can be shown in the right-click menu or triggered by PDM events. To edit a script you saved earlier, use Open, then Vault script instead.
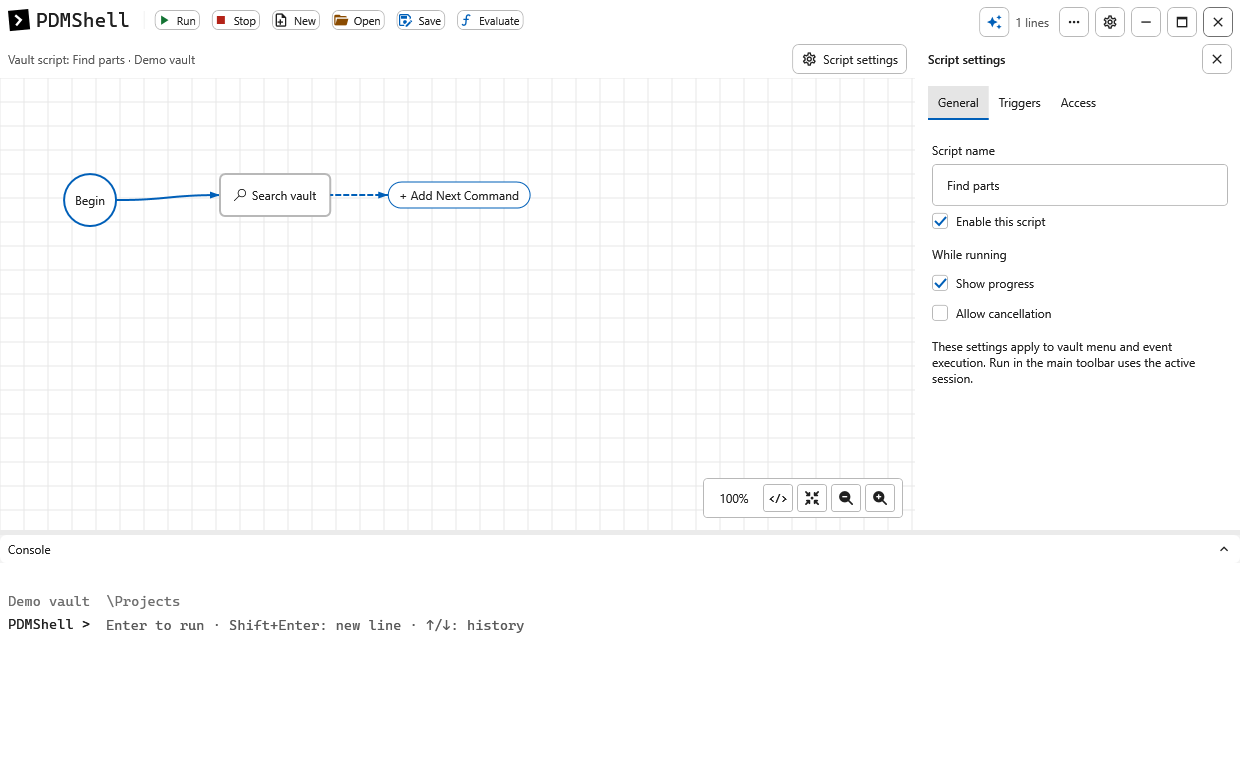
PDMShell opens a vault draft in the visual editor, with the Script settings panel on the right. The draft is not published until you click Save, so you can experiment freely.
Step 3: add the commands
The canvas starts with a Begin action. Click Add a new action to open the command picker, then search for the command you want. Typing checkout finds Check out, typing variable finds Set variable value, and so on.
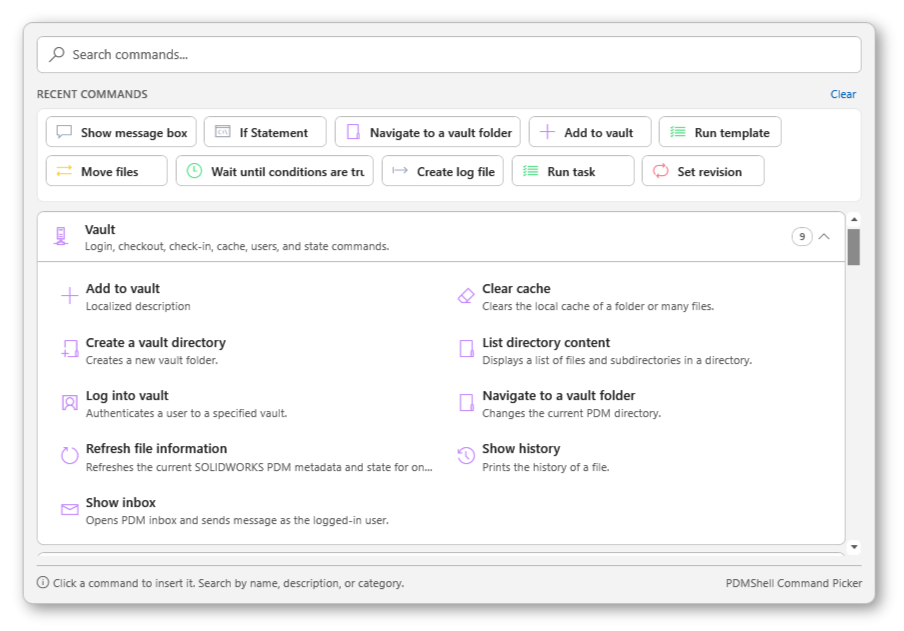
Add the five actions in order: Check out, three Set variable value actions, then Check in. Select each action to fill in its settings in the Command Parameters panel. For every command, set filePath to $localPath, which is the selected file when the script runs from the right-click menu. Double-click an action to give it a readable name such as Set description.
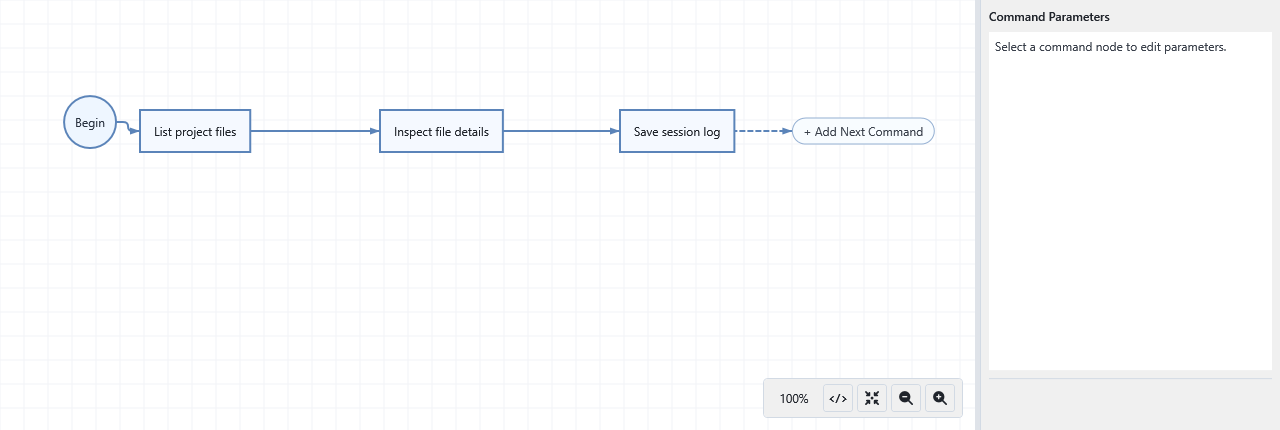
Prefer typing? Switch to code view with the code button and paste the script above. The visual workflow and the code stay in sync.
How each line works
Line 1: check out the selected file
checkout -filePath "$localPath"$localPath is filled in by the add-in with the local path of the file the user right-clicked. Data card values can only be written to a checked out file, so this comes first.
Line 2: tidy an existing value
setvar -filePath "$localPath" -variableName Description -value $value -stringformat UpperCaseIn setvar, $value stands for the variable’s current value. With -stringformat UpperCase, this line rewrites the existing description in capitals, a quick way to enforce a naming standard.
Line 3: record who ran it
setvar -filePath "$localPath" -variableName "Checked By" -value "$username.FullName"$username.FullName is the full name of the PDM user who ran the command, when it is set on the user’s profile. The variable name has a space, so it is wrapped in quotes.
Line 4: stamp the date
setvar -filePath "$localPath" -variableName "Checked Date" -value "$yyyy-$MM-$dd"$yyyy, $MM and $dd are date placeholders, so this writes a date such as 2026-10-14. Change the format to match how your data card displays dates.
Line 5: check it back in
checkin -filePath "$localPath" -comment "Properties updated by PDMShell"The comment appears in the file’s history, so anyone can see later why a new version was created.
Need more properties? Add more setvar lines. The setvar reference shows other useful values, including text replacement, the next revision and PDM serial numbers, and the add-in placeholder list shows everything you can use in a menu script, such as $fileName, $state or another variable with $(Variable.@).
Step 4: General settings
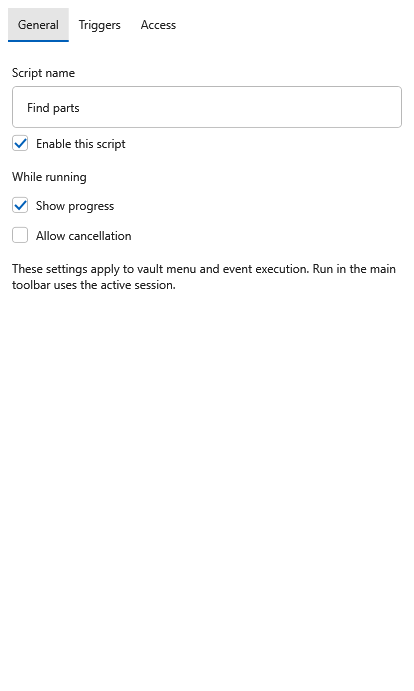
Open the General tab in Script settings. Give the script a name administrators will recognize, for example Update properties. Make sure Enable this script is ticked. Leave Show progress on, so users see a progress dialog while it runs, and leave Allow cancellation off for a short script like this one, so it is never stopped halfway between check out and check in.
Step 5: Triggers, the right-click menu
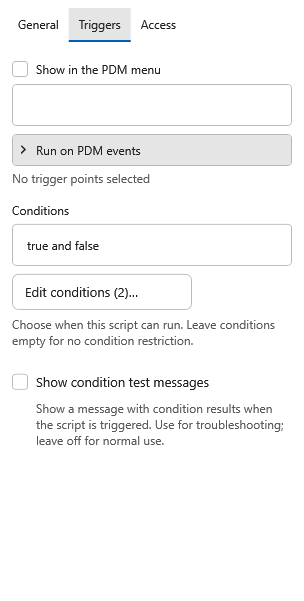
This is the step that puts the script in the menu. On the Triggers tab, tick Show in the PDM menu and type the menu text exactly as users should see it. Backslashes create submenus, so PDMShell\Update Properties appears as Update Properties under a PDMShell submenu. You can group further, for example PDMShell\Engineering\Update Properties.

Leave Run on PDM events closed. Those trigger points are for scripts that run automatically, and this one should only run when a user asks for it.
Conditions control when the menu command is allowed to run. Click Edit conditions to open the conditions editor, for example to limit the command to files in a certain workflow state. Leave the box empty for no restriction while you test. Tick Show condition test messages only while troubleshooting conditions.
Step 6: Access
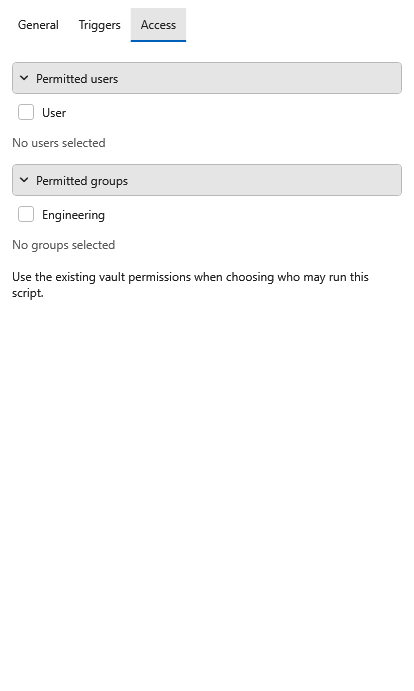
On the Access tab, choose which users and groups may run the script. Picking a group such as Engineering is easier to maintain than individual users. The command also respects existing vault permissions, so a user still cannot check out a file they are not allowed to.
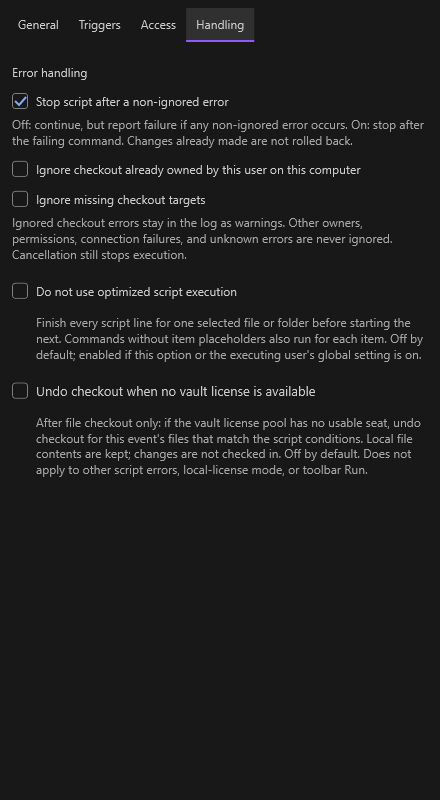
Step 7: Handling
The Handling tab decides what happens when something goes wrong. For a check out and check in script, two settings matter:
- Tick Stop script after a non-ignored error. If the check out fails, for example because someone else has the file, the script stops instead of trying to write properties and check in.
- Consider Ignore checkout already owned by this user on this computer. With it on, a user who already has the file checked out can still run the command, and PDMShell logs a warning instead of failing.
Do not use optimized script execution makes PDMShell finish all five lines for one selected file before starting the next, which is easier to follow when users select several files at once. Undo checkout when no vault license is available is useful if you run the add-in from a license pool that can run out of seats.
Step 8: Save to the vault
Click Save. Nothing is published until you do. Save sends the code, the visual layout and every setting to the vault in one go. When you add or change a menu command, PDMShell asks you to restart Windows Explorer so PDM reloads its menus. Logging out of the vault and back in works too.
Step 9: run it from the right-click menu
Open SOLIDWORKS PDM File Explorer, right-click a file, and choose PDMShell, then Update Properties. The add-in checks the user’s permission, evaluates your conditions and runs the script against that file, with a progress line showing which action it is on. Open the data card afterwards to confirm the three values, and look at the history to see the check-in comment.
Test on a single file before announcing it. Running a draft from the PDMShell toolbar changes real files too, so use a test file there as well.
Common questions
The command does not appear in the menu
Restart Windows Explorer or log out and back in to the vault after saving. Then check that Enable this script is ticked, that Show in the PDM menu is on, that your user is allowed on the Access tab, and that the PDMShell add-in is installed in that vault.
Can I run it on several files at once?
Yes. Select several files and run the command once. Each selected file goes through the script. Turn on Do not use optimized script execution if you want each file to finish completely before the next starts.
Does this need a PDM task or Dispatch?
No. Menu scripts run straight from the add-in, with no task and no workflow transition. See our comparison of PDMShell and Dispatch for where each fits.
Looking for more ideas? Our posts on moving files to the right range folder and updating references in bulk use the same vault script setup with different commands.
Need help with SOLIDWORKS PDM automation?
If you have a list of repetitive PDM jobs your team does by hand, we can turn them into right-click commands. Contact us and we can build and deploy the scripts with you.