SOLIDWORKS PDM tasks allow administrators to automate routine operations like file conversion, publishing, or printing—saving time and reducing errors across engineering teams. This article walks you through the process of setting up your first PDM task, using any compatible task add-in such as PDMPublisher. Whether you’re exporting PDFs or triggering custom workflows, properly configuring a task ensures consistency, control, and efficiency across your vault.
Step 1: Create the Task
- Open the Administration Tool.
- Right-click on Tasks and select New Task….

- In the first page of the wizard, give your task a unique name.
- Select the appropriate task add-in (e.g., PDMPublisher) from the dropdown list:

Step 2: Configure the Execution Environment
On the Execution Method page:
- Define which computers in your network are allowed to run the task.
- If no computers are listed:
- Right-click the SOLIDWORKS PDM icon in the Windows system tray:

- Select Task Host Configuration.
- Ensure the task add-in (e.g., PDMPublisher) is enabled.
Step 3: Configure Task Settings
Depending on the add-in, you may see one or more configuration tabs. For PDMPublisher, configure the following:
- Options – Define output format(s), destination folders (SharePoint, PDM, or file system), and export rules.
- Annotations – Choose whether to include stamps, watermarks, or approval blocks.
- Conditions – Define when and where the task should be available (e.g., file types, workflow states).
Step 4: Finalize
Click OK to save the task.
- The task will now appear in the right-click menu under Tasks in the vault’s File Explorer.
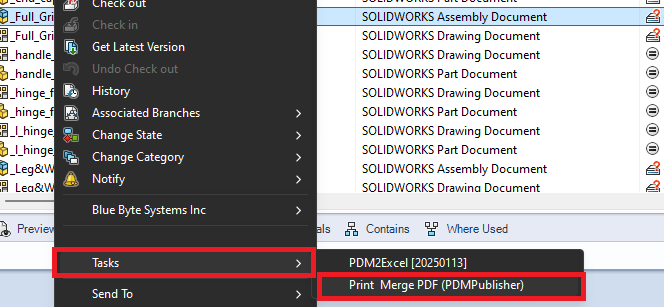
Troubleshooting
Task Menu Not Visible?
If you don’t see the Tasks menu in File Explorer, it’s possible your user or group settings have disabled task access:
- In the Administration Tool, open the User Settings for the affected user or group:

